Start by editing the Product on the “Content” tab. To do this:
From the admin
Go to “Products” > “Search Products” search for your product and press “Edit” next to the product you want to change.
From the front end
View the product detail page on the front end of the website and press “Content” in the admin bar to get to the Content editing page.
Adding/Editing the Photo
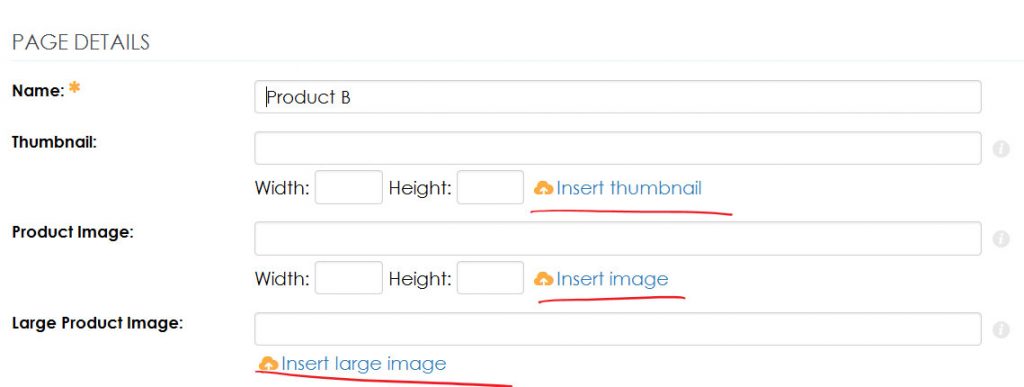
The thumbnail field is for the image that will appear on the Category page that lists all the Products. These photos are generally smaller because you’re displaying many products on the page.
NOTE: It’s a good idea to upload a small copy of your photo for the Thumbnail to keep the size of your page down so that it loads faster. Talk to your website developer about this if you need help.
The large image field is for the Product Detail page hero image. This is the first image you see when you view the Product Details and it’s often a larger image because only the one product is being displayed here.
To add or edit the image you want in either of these fields press the IMAGE ICON.

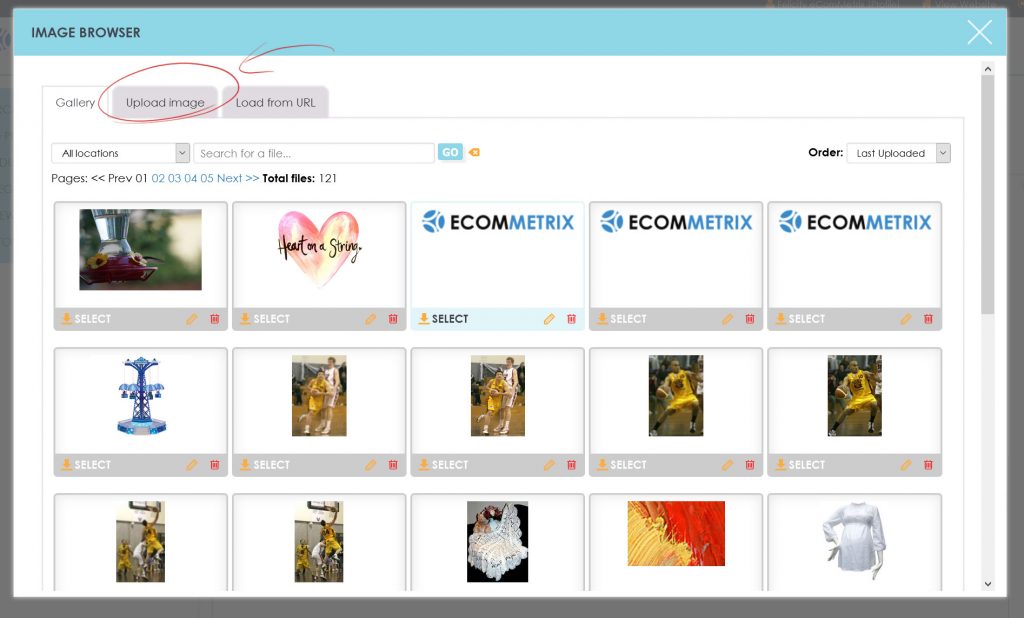
Your sites IMAGE BROWSER will open. All the images you use in your website are kept here and you can use an image you already have in your website, or you can upload a new image. To upload a new image click “Upload image” from the tabs at the top of the page.

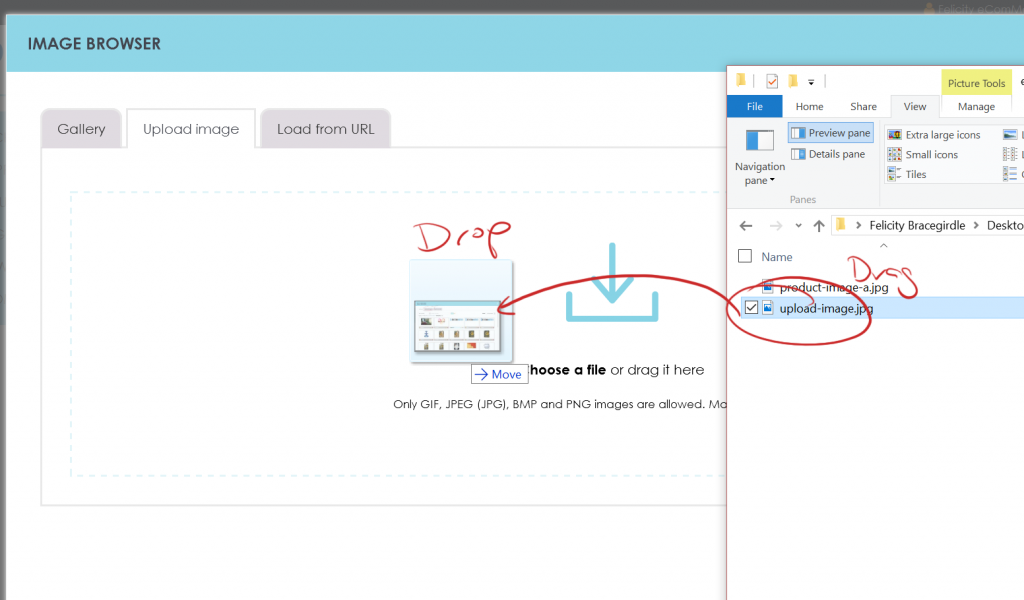
There are 2 ways to upload your images:
- Click “Choose a file” to open up your file upload browser. Locate the file on your computer and press “Open”.
OR - Drag and drop an image from your computer onto the blue area of the screen and the image will upload automatically (multiple files can be selected and uploaded at once this way).

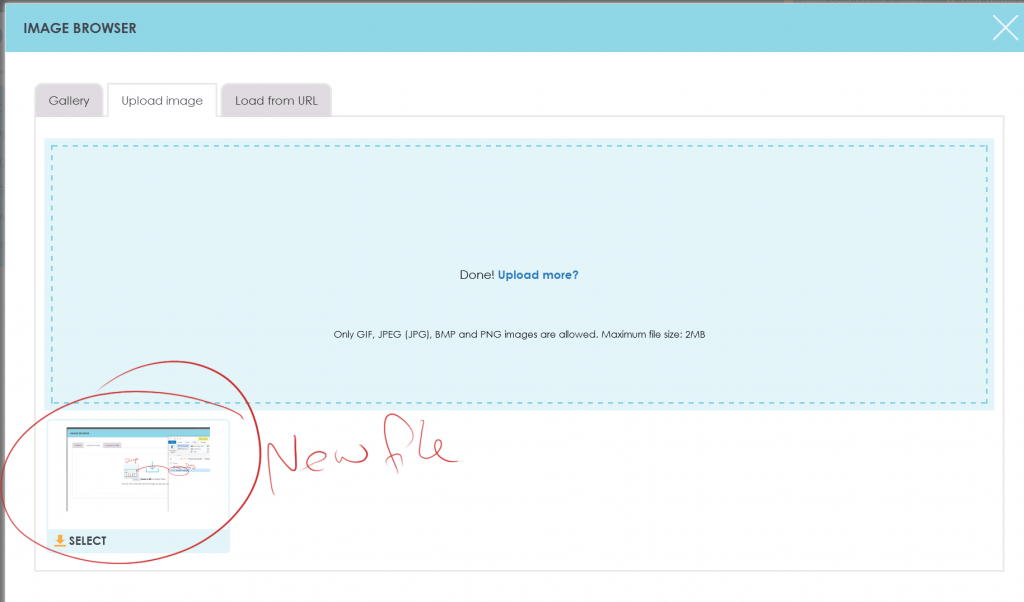
Once the picture is uploaded you’ll see it in the preview window. At this point you need to click on the picture or press “Select” to add it to your product:
Repeat this process by clicking the INSERT IMAGE icon next to the appropriate fields and following the steps above.
*IMPORTANT* Once your product images are added, press the “SAVE” button to save those product changes.